Ace Member's Area

Setting Up Your New E-Commerce Website

A Simple Step-by-Step Guide

Step 1 – Create Your Hosting Account

Congratulations on taking the first step towards having your own online store! To get your website live, you’ll need to set up a hosting account with our partner, WPEngine. Click this link to start setting up your hosting plan through our partner WPEngine. (it will open in a new tab/window)

Disclaimer: It is highly recommeneded to follow this guide while using a desktop computer.
It may be possible to do certain steps while on a mobile device, but the guide is written with the assumption the reader is on a desktop computer.

“An e-commerce site is like a digital salesperson, working for you around the clock, 365 days a year.” – Unknown

Quick List:

(Follow the steps below or click them for more information!)

1.) Click Link, Create Account, Select Plan

There are quite a few different hosting plans on the page. You may just want to start with the ‘Managed Hosting Startup’ or ‘ECommerce Hosting Startup Plan’ and upgrade from there after your store is running.

We find WPEngine’s “Smart Plugin Manager” to be especially useful in ensuring your site is always up-to-date and running as you designed it to, but each of the offered addons have their use cases–make sure to think about your business’s needs!

WPEngine will be the central hub of your website management, so make sure to use information you can easily remember later.

For being an Online Cash Machine VIP Member, you’ll automatically receive a special offer when choosing an annually renewed account. Check that the code “FREEDOMTOCREATE” is shown on the checkout screen to be sure you’re receiving your benefits.

Finalize your account creation and you’re ready to move onto step 2: Account Creation and exploring your new Website Portal!

You may choose a ‘Monthly’ Plan but we LOVE the savings of the ‘Annual’ Plan.

Step 2 – Activating your Account

Great work on setting up your hosting account with WPEngine. The next step is to activate your account!

Quick List:

(Follow the steps below or click them for more information!)

1.) Activate Account

You’ll receive an email from WPEngine with an activation Link. Let’s Activate!

Click the Link, Create your Password and you’ll be in your new WPEngine account for the first time.

Take a moment to look around your account. WP Engine offers a quick tour and tutorial of your User Portal that we recommend going through to familiarize yourself with your options.

Make sure your general profile settings (like users, logins, passwords, etc.) as well as all contact and billing information are correct. Once you’ve checked that they are, you’re ready to move on to Step 3: Adding a New Site!

Note: If you have any questions or need help, WP Engine has a great Help section and tutorials to assist you.

Click Here to access WPEngine’s Resource Center

Step 3 – Adding a New Site

Now that your account is activated, let’s add a new site to your hosting account.

Quick List:

(Follow the steps below or click them for more information!)

1.) Start with a Blank Site

From your Portal, Select Add a new Site, and then choose The site is mine and the Start with a blank site option. Click Next.

Choose Create a new site as the destination for your migrated site and then click Next.

You’ll be asked to name your site and choose a subdomain. (We’ll set up your domain name later

Choose the Production (live) Environment Type

Click Add site and go to Migration page.

WPEngine will send you an email once it has finished the initial set-up of your new site. Once you’ve received the email, you can move on to Step 4: Migrating the Demo to your New Site!

Note: If you have any questions or need help, WP Engine has a great Help section and tutorials to assist you.

Click Here to access WPEngine’s Resource Center

Step 4 – Migrating our Demo Store to your Site

Now that your site and hosting is created, it’s time to migrate our demo store to your site.

Quick List:

(Follow the steps below or click them for more information!)

Alert: Skip/Ignore Download Plugin steps from the video and the WP Engine Site Migration Page. There is No need to Download the WP Engine Migration Plugin. We’ve already done this step for you on our Demo Site.

At this point in the process, WP Engine automatically takes you to the automated migration page in your WP Engine account.

From your WP Engine Portal, you should still be on the Automated Migration page.

Click Generate New Credentials. This will automatically create the credentials you’ll use in the following steps.
(If there’s a message about SFTP credentials not ready, just refresh page after a few minutes)

Alert: Skip/Ignore Download Plugin steps from the video and the WP Engine Site Migration Page. There is No need to Download the WP Engine Migration Plugin. We’ve already done this step for you on our Demo Site.

Open a new Window or Tab: Use the information below on our Demo Store (and login information) for the Site you selected. Go here and log in to start the migration process.

Log In Here
User: demo
Password: mBA2AC9$JIEJgKliqrO*4C0z

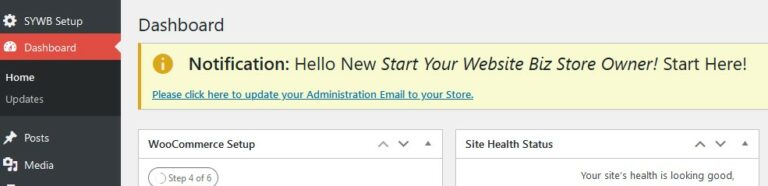
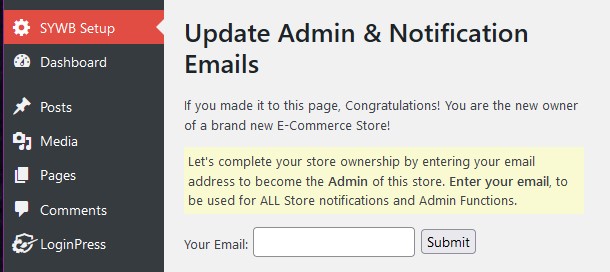
Once logged in, you’ll be taken to a screen to enter your email, then you can start adding in your Migration Settings. ​
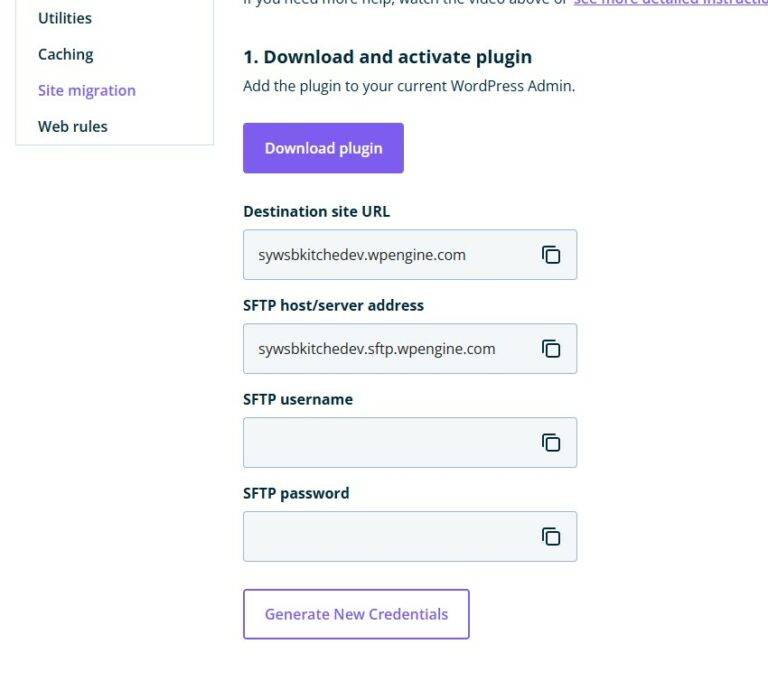
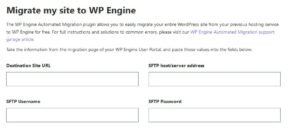
Enter the information from WPEngine’s Migration Setting’s page that you opened in the original tab/window. Click Migrate to begin migration of the demo to your new site. 
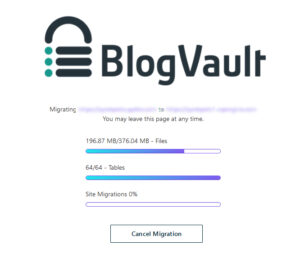
Note: This process could take up to 25 minutes.
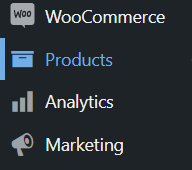
After the site has migrated, you will receive an email notifying you the process has completed. The easiest way to get into your site at this point is from your WP Engine Portal. Go to your Sites section and click the ‘WP Admin‘ button on the right side of your portal. This will log you in without the need of a username/password. (something you’ll definitely want to get set up soon.) This will be explained it detail when you move on to the next step: Post-Migration Cleanup & Store Set-Up!

Step 5 – Post-Migration Clean-up & Store Set-up

Great work on migrating the demo store to you new site. The next step is performing some cleanup and store set up.

Quick List:

(Follow the steps below or click them for more information!)

1.) Log in to your newly migrated site

Once the migration has finished, you may use the WP Admin tab in your WPEngine account to easily access your new site’s WordPress dashboard.

When you log in to your new site, on the Dashboard, you’ll see a notification on the top of the screen. Hello New Website Store Owner! Start Here! Click that and follow the instructions.

Simply entering your email address will update and set your email address to all the fields required for your new store setup.

Follow any additional steps given by the plugin.

Please Note: This is a 1-time action, so make sure to enter your email correctly. If you enter your email incorrectly, you will need to manually update your email throughout the WordPress and WooCommerce

Note: If you have any questions or need help, WP Engine has a great Help section and tutorials to assist you.

Click Here to access WPEngine’s Resource Center

Step 6 – DropshipMe Setup

Now that your account is activated, let’s add a new site to your hosting account.

Quick List:

(Follow the steps below or click them for more information!)

This is where all the magic happens.

First off, go to Dropship.me and follow the “Get my Plugin Now” button to get your Free API Key.

Add that API Key to your Dropship.me plugin’s Activation Settings.

Once you’ve added your API key, you’ll immediately be able to begin stocking your ecommerce business with products of your choosing.

We’ve already added 20 of top trending products to your store and you have the option to add up to 30 additional products, or swap out any of the products we’ve imported for you.

(Additionally, you can upgrade your DropshipMe account to unlock even more product slots for your store).

The process of adding new products to your store is super simple:

  1. Go to the DropshipMe Menu
  2. Select the category of items you want your store to sell (don’t miss out on specifying sub-categories!)
  3. Select the products you want stocked in your store and click ‘Import’!

It’s just that easy!

Once you’ve imported all the products you want stocked to your store, you can review and edit them at any time by clicking the Products menu in your WordPress dashboard.

Note: If you have any questions or need help, WP Engine has a great Help section and tutorials to assist you.

Click Here to access WPEngine’s Resource Center

Step 7 – Enabling Paypal Purchasing on your Website

You’re nearly entirely set up, but as it is now, none of your customers will be able to actually purchase anything! Follow these steps to allow your site to accept payments via the Paypal system.

Quick List:

(Follow the steps below or click them for more information!)

Log in to your WordPress dashboard, either through the WPEngine Admin menu or with the user account details you will have made when using the SYWB Setup Plugin.

Next, you’ll need to navigate to the Payment tab of the WooCommerce Settings Menu.

You may or may not see a small banner in the top of the screen saying “PayPal Payments is almost ready. To get started, connect your account.” If so, feel free to click the link within it, otherwise, click the “Finish Set-up” button to the right of the “Paypal” option (it should be the top row).

You will be brought to a page where you can choose the way you want Paypal to be integrated into your store. We recommend using the following options for most users, however your circumstances may call for different plan options.

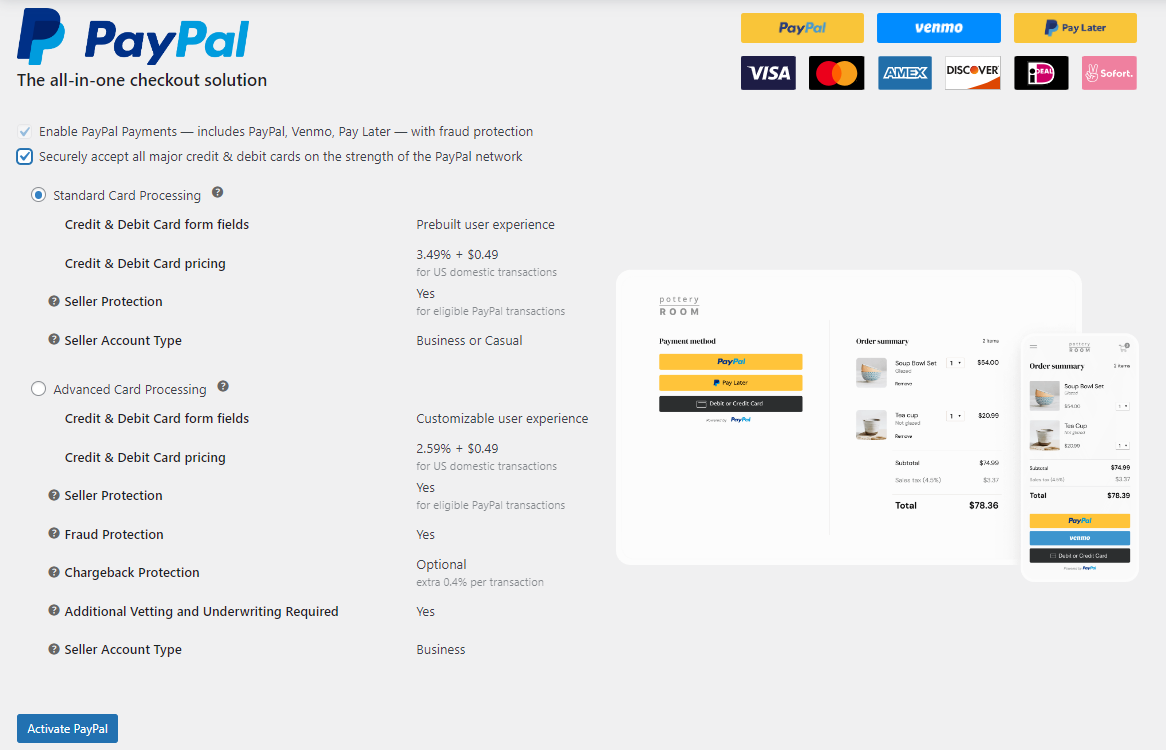
Once you have selected the options you’ve chosen, click the blue “Activate Paypal” button and follow the prompts it gives you to either connect your existing Paypal account to your store, or create a new account that will manage your store’s transactions.

Note: If you have any questions or need help, WP Engine has a great Help section and tutorials to assist you.

Click Here to access WPEngine’s Resource Center

Step 8 – Setting Up Your Domain Name

The Finish Line! Congratulations, you’re on your way to building an Online Store that will bring in revenue and change your life!

Quick List:

(Follow the steps below or click them for more information!)

Although your website is currently live and customers could start purchasing your products, you’ll probably want to purchase a domain name and set that up for your website–currently your site is using a subdomain of WPEngine.

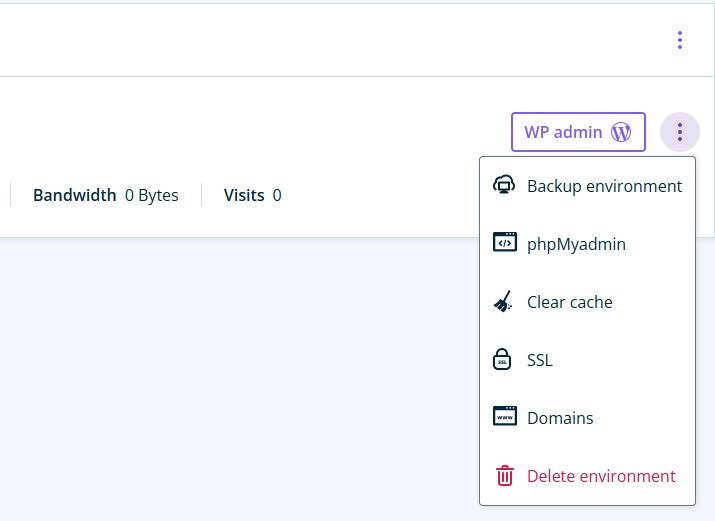
You can find steps to do this in your WPEngine Portal. On the far right of your Site Options, click the 3 vertical dots and select Domains.

Then click Add Domain. If you already have a domain, you can use that. Otherwise, select the I haven’t purchased this domain option and follow their steps. (They’ll recommend a few options. Cloudflare is our favorite.) If you get stuck at any point in setting up your domain name, use WPEngine’s Support to help you along.

You’ve now completed the setup of your website! This is just the beginning of your journey. Use the information provided in our Members Area to continue developing your marketing strategies, ads and product copy.

If you need any help at all, please don’t hesitate to reach out, we are here to help make YOU money! We can’t wait to see how far you go!

Note: If you have any questions or need help, WP Engine has a great Help section and tutorials to assist you.

Click Here to access WPEngine’s Resource Center